Sunday, December 20, 2009

New Year's Garv

Here is my latest tag with Jo's Party Time kit. No tut available currently, but a great example of how you can use this kit.


Sunday, November 15, 2009

Tag with Jo's New Kit


This is my newest tag made using a kit called Pink Winter by CreationsbyJo. You can find the kit on her blog HERE! No tutorial for this tag, its very basic, so buy the kit and then try it out for yourself!

Thursday, September 10, 2009

Autumn Fairies Tutorial

New Tutorial Autumn Fairies
©BamaVamp


I finally got inspired to write a new tutorial. The inspiration came from a friend, Artmama, over at Wicked Angelz PSP Forum and her WA exclusive Autumn Kisses scrap kit.

You can preview the tag below and the link under the tag will take you to the tut.


You can find my tutorial HERE.

Tuesday, August 4, 2009

Update and a New Kit by Me

I have decided to stop hosting my full tutorials on my blog and instead use a web site. After doing several tuts on various blogs, I found it very annoying to keep having to scroll down so much just to get one step done. I will post the previews on my blog along with a link to the tutorial. That is, if I ever get around to writing another.


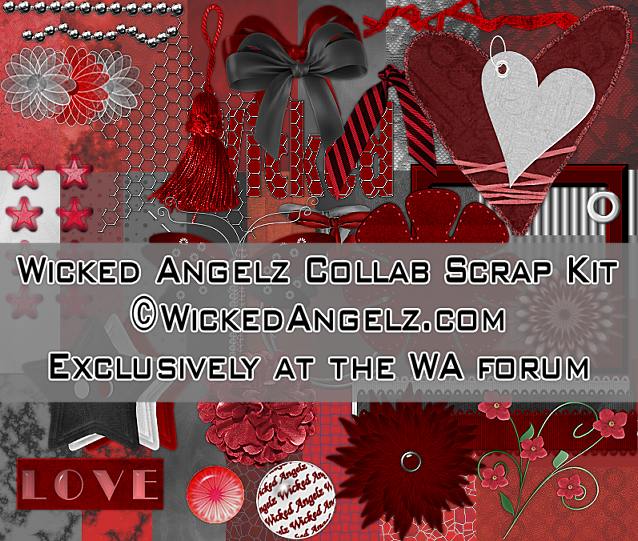
I have created my first scrap kit for Wicked Angelz. There are 20 papers and at least twice as many elements in this kit. The only place you can get it is at our wonderful psp forum Wicked Angelz.
Preview is below, as always preview is smaller than actual file.


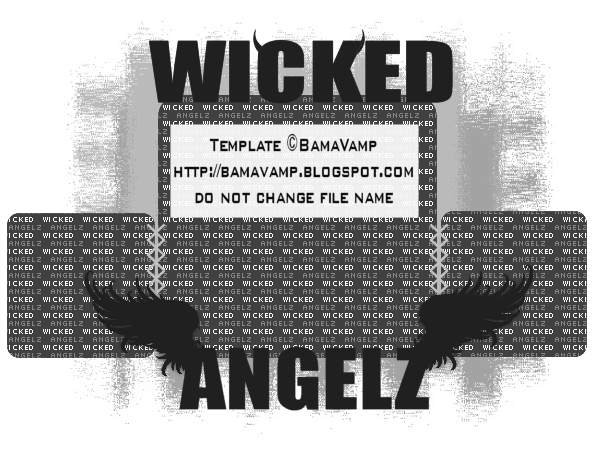
And a new template which is also exclusively available at Wicked Angelz.


We would love to see ya over there!

Tuesday, July 28, 2009

WA Exclusive Scrap Kit

I am so proud of my girls at Wicked Angelz. I asked them to come up with some creations to put in a first ever WA Collab scrapkit and they did it. Not only did we get a scrap kit but templates as well!

The previews are below, but the stuff is only available at Wicked Angelz PSP forum. The kit is of course a taggers size kit, and both the kit and the templates are larger than shown below.


I am planning on getting the girls together for another kit and templates in a couple of months, hopefully just in time for my favorite holiday--Halloween!!

Wednesday, June 17, 2009

Tutorial #22 Purple Passion

Purple Passion
©BamaVamp


For this tutorial you will need the following:
Vix mask #197, find it HERE
Eyecandy 4000 Gradient Glow(optional)
Brush of your choice (optional)
PTU Scrap Kit called Night Scene from Jo, you can find it HERE
Tube of your choice. I am using the arwork of Elias Chatzoudis, you must purchase a license from mypsptubes to use the same tube.

Find the elements from the scrap kit you wanna use, as well as your psp tube and open them up in PSP.
I have used BeautifulBow, MetalSkull, WingedBlingHeart, and WrapFrame2 from the kit.

Create a new canvas 500x500 white background. Add a new raster layer and floodfill with a color that corresponds to your tube.
I used #6e008e. Find the Vix mask and apply to your colored floodfill layer, then merge group.
Go to Adjust...Add Noise..Uniform at 35 percent with Monochrome checked.

The rest is basically copying and pasting. Copy n paste your frame to your new canvas, as well as your main tube,
and any elements you are using and place accordingly. I added a Sexy Ass Bitch brush as well.
I added a gradient glow to everything but the frame with the settings of Glow Width 3.00 and under color set it
to the Fat Setting and apply.
I also added a small drop shadow to the same layers that I added the glow to. I used settings of 2 2 70 2.89 black.

Add your name. I used the same Glow and Drop Shadow as before.
Save your work!


This tutorial was written by BamaVamp on 6/17/09.
Do not copy nor translate this tutorial.
Contact me for usage information.
Any likeness to any other tutorial is purely coincidence.

Wednesday, June 10, 2009

Tutorial #21 Angels are like Diamonds

Angels are Like Diamonds
©BamaVamp


Supplies Needed:

~Mask 219 by WeeScotsLass
~Tube of your choice. I am using the licensed work of Jose A Cano. Please purchase his work at mypsptubes.com if you wish to use the same tube.
~Clouds by Rainbow Coffi(included)
~My Angel wording (included)
~PTU Scrap Kit by CBJ called Fairy Wingz and Blingz--I only used 2 parts from this kit, a paper and a diamond accent, so its not *required* for this tutorial, but I highly recommend it as it is a fantastic kit.
~EyeCandy4000 Gradient Glow(optional)

My Supplies are HERE.
---------------------------------------------------

Let's Get Started!

Open a new canvas, 600x600 in size, white background. Open your supplies in PSP as well.

I used one of the scrap papers from Jo's kit, but you can simply use a corresponding color for your background mask. If you use a paper, copy n paste the paper unto your working canvas as a new layer. Otherwise just add a new layer and floodfill with a color corresponding to your tube. Go to Layers..New Mask Layer..from Image and load the WSL mask. Right click on the Mask layer in your pallete and merge the mask group together.

If you are using the diamond accent from the kit, click on the Mask Layer go to Selections..Select All..Selections Float...Selections Defloat. Paste your diamonds as a new layer, then go to Selections..Invert and hit the delete key on your keyboard. This should get rid of all the excees diamonds around your mask layer. Go to Selections..Select None.

Now copy n paste your main tube as a new layer. Place her in the middle of your masked layer. Go to Effects..EyeCandy4000..Gradient Glow. Under Basic, change your Glow Width to 3.00 and under Color, chooe the Fat setting and Apply. I added a slight drop shadow of 2 2 50 5.00 using as darker color from my tube.

Copy n paste a cloud of choice to your canvas, resize as needed. I duplicated the cloud and placed them side by side at the bottom of the canvas.

Copy n paste the Angel wording as well. Feel free to colorize to match your tag, just don't share it or use it as supples in another tutorial.

Add your name. I used a font called CAC Champagne, using the dark color from my tube then adding the same Gradient Glow and drop shadow as we used on our tube.

Add your copyright/watermark information and save!


This tutorial was written by BamaVamp on 6/9/09.
Do not copy nor translate this tutorial.
Contact me for usage information.
Any likeness to any other tutorial is purely coincidence.