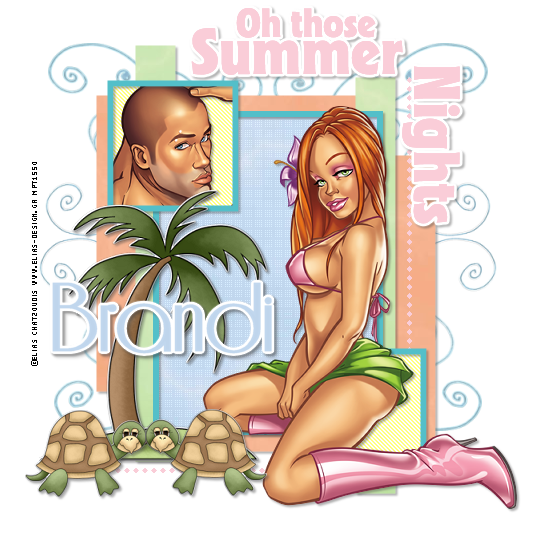
Those Summer Nights
© BamaVamp

Supplies Needed:
Template 52 from Melissaz Creations
Scrap Kit of your Choice. I am using a PTU kit called Beach Bum from Creations by Jo.
At least 2 tubes of your choice, one male and one female works best. I am using the licensed artwork of Elias Chatzoudis. You must have a license from mypsptubes.com to use his work.
Penta Jeans Plugin (optional)
Penta Dot & Cross Plugin (optional)
EyeCandy 4000 Gradient Glow..my glow setting found here. (optional)
Let's Begin!
Open the template, your tubes and scrap kit in PSP.
I started by deleting the copyright layer as well as the palm trees. If you do not have a palm tree in your scrap kit, you might wanna keep them.
I picked 3 papers from the scrap kit that I wanted to use. As well as the palm tree and turtle from the kit.
We are gonna start at the bottom and work our way up.
Scrap Kit Paper Steps..when using scrap kit papers in a template the actions are all the same. I will explain it in this first step and after that I will just say refer to the Scrap Paper Steps.
Highlight the Background Squares layer, go to Selections..Select All. Selections..Float. Selections..Defloat. Copy and paste the scrap paper that you wanna use as a new raster layer. Go to Selections...Invert and hit Delete on your keyboard. Go to Selections..Select None. Now delete the layer called background squares.
Click on the Narrow Rectangles Layer, follow the Scrap Paper Steps but add a different scrap paper.
Click on the Dotted Line layer. I did not use a paper here. I just went to Selections..Select All. Selections..Float. Selections..Defloat and used the paint brush to fill in the dots. Then deleted the original Dotted Line layer.
Click on the Rectangle layer and follow the Scrap Paper Steps.
While still on your new rectangle layer, go to Penta..Dot & Cross with the settings on 22, 10 and 2.
Click on the Rectangle Frame. I did not use a paper here either. Instead I just grabbed my floodfill tool and colored them. I also used this same step on the Square Frames layer as well.
Click on the Squares layer, I just floodfill this layer with a color of choice. Then went to Penta...Jeans with the settings of 79 and 4.
Highlight you Wordart layer. Use the Scrap Paper Steps, but instead of using a paper I added a new raster layer and floodfilled with a color of choice, then deleted the Wordart layer.
While still on the wordart layer, go to Eyecandy 4000..Gradient Glow. I used my doublewhiteglow setting. Then added a drop shadow of 2, 2, 41, 2.89 color #404040.
Use the same drop shadow for all your layers we just worked on, excpet for the dotted lines.
Now time to add the tubes of your choice, add the same drop shadow.
Add a new raster layer to the bottom of your canvas and floodfill with white.
I also used some doodles from the scrap kit to add a little accent to the background.
Add your text. I used a font called Riesling and added my gradient glow and the same drop shadow to my name.
Don't forget your copyright/watermark information as well.
Save and enjoy!
© BamaVamp

Supplies Needed:
Template 52 from Melissaz Creations
Scrap Kit of your Choice. I am using a PTU kit called Beach Bum from Creations by Jo.
At least 2 tubes of your choice, one male and one female works best. I am using the licensed artwork of Elias Chatzoudis. You must have a license from mypsptubes.com to use his work.
Penta Jeans Plugin (optional)
Penta Dot & Cross Plugin (optional)
EyeCandy 4000 Gradient Glow..my glow setting found here. (optional)
Let's Begin!
Open the template, your tubes and scrap kit in PSP.
I started by deleting the copyright layer as well as the palm trees. If you do not have a palm tree in your scrap kit, you might wanna keep them.
I picked 3 papers from the scrap kit that I wanted to use. As well as the palm tree and turtle from the kit.
We are gonna start at the bottom and work our way up.
Scrap Kit Paper Steps..when using scrap kit papers in a template the actions are all the same. I will explain it in this first step and after that I will just say refer to the Scrap Paper Steps.
Highlight the Background Squares layer, go to Selections..Select All. Selections..Float. Selections..Defloat. Copy and paste the scrap paper that you wanna use as a new raster layer. Go to Selections...Invert and hit Delete on your keyboard. Go to Selections..Select None. Now delete the layer called background squares.
Click on the Narrow Rectangles Layer, follow the Scrap Paper Steps but add a different scrap paper.
Click on the Dotted Line layer. I did not use a paper here. I just went to Selections..Select All. Selections..Float. Selections..Defloat and used the paint brush to fill in the dots. Then deleted the original Dotted Line layer.
Click on the Rectangle layer and follow the Scrap Paper Steps.
While still on your new rectangle layer, go to Penta..Dot & Cross with the settings on 22, 10 and 2.
Click on the Rectangle Frame. I did not use a paper here either. Instead I just grabbed my floodfill tool and colored them. I also used this same step on the Square Frames layer as well.
Click on the Squares layer, I just floodfill this layer with a color of choice. Then went to Penta...Jeans with the settings of 79 and 4.
Highlight you Wordart layer. Use the Scrap Paper Steps, but instead of using a paper I added a new raster layer and floodfilled with a color of choice, then deleted the Wordart layer.
While still on the wordart layer, go to Eyecandy 4000..Gradient Glow. I used my doublewhiteglow setting. Then added a drop shadow of 2, 2, 41, 2.89 color #404040.
Use the same drop shadow for all your layers we just worked on, excpet for the dotted lines.
Now time to add the tubes of your choice, add the same drop shadow.
Add a new raster layer to the bottom of your canvas and floodfill with white.
I also used some doodles from the scrap kit to add a little accent to the background.
Add your text. I used a font called Riesling and added my gradient glow and the same drop shadow to my name.
Don't forget your copyright/watermark information as well.
Save and enjoy!
This tutorial was written by BamaVamp on 6/1/09.
Do not copy nor translate this tutorial.
Contact me for usage information.
Any likeness to any other tutorial is purely coincidence.
Do not copy nor translate this tutorial.
Contact me for usage information.
Any likeness to any other tutorial is purely coincidence.


No comments:
Post a Comment