Payback Is A Bitch Tutorial
©BamaVamp

Supplies Needed:
My Pinstripe Background Tile (do not share)
My Gun Silhouette (do not share)
You can find them both here.
A PSP Tube of your choice.
I am using the artwork of Keith Garvey. You may purchase his work atMyPSPTubes.com
A font of your choice.
~~~~~~~~~~~~~~~~~~~~~~~~~~~~~~~~
Open my gun and background tile in PSP.
Open a new image 600x600 (we will crop later). Floodfill with white.
If your tube doesn't have much purple, feel free to colorize my background
tile, just please do not share it in anyway.
Grab your preset shape tool on Rectangle..
Foreground Black and Background Pinstripe Pattern, Line Width 2
Draw out a rectangle and convert to raster layer.
Grab your gun silhouette tube and paste as new layer inside your rectangle.
Resize your gun so that 2 of them can fit inside the rectangle.
Duplicate your gun, go to Image, Mirror. I moved my 2nd gun up and to the right a bit.
Hide your white background and your rectangle and merge the 2 guns to a
single layer. Rename this layer Guns.
Go to Selections..Select All. Selections..Float. Selections..Defloat. You should now have marching ants around your guns.
Go to Selections..Modify..Contract by 2. Then back to Selections and hit Invert. Duplicate your guns 2 times for a total of 3 gun layers.
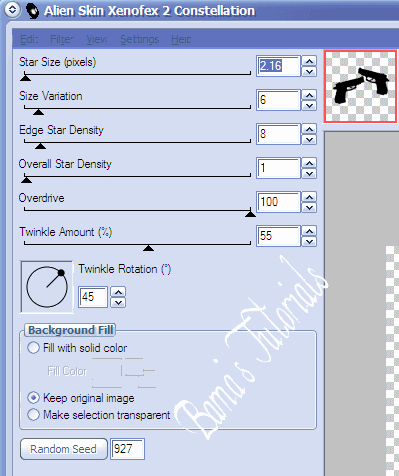
On the bottom gun layer, go to Effects...Plugins...Alien Skin...Xenofex
2..Constellation. Under the Settings, go to Small Star Constellation. It
will turn it all black, so we need to go down to the Background Fill, and
click "Keep Original Image".

Click okay. Repeat the Xenofex step above, but hit Random Seed each time you do a different layer.
When you have done all 3 guns layers, go to Selections..Select None.
Paste your Main tube, resize if needed. I put my girl in the middle of
both guns and added a drop shadow to her of 2 2 100 2.89 black and
repeated the shadow with -2 and -2. Add whatever text you would like, add the same drop shadows as above. Then add your copyright and watermark information.
Now for the fun part, Animation Shop. Everyone does their animation differently, this is my chosen method.
Close out all layers except for your text, copyright info and main tube.
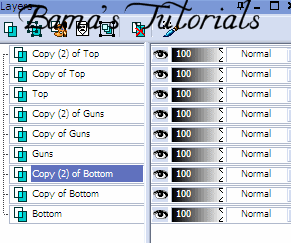
Merge these 2 layers visible, duplicate 2 times. Rename Top. Close out all the layers except for your rectangle and white background, merge these layers visible. Rename Bottom.
You should now have a total of 9 layers that looks similiar to this:

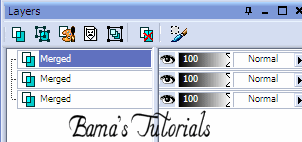
We want to merge one bottom, one guns, and one top layer together. Repeat
with this 2 more times so you are left with only 3 layers:

Crop as much of the tag as you want.
File...save as and save on your desktop. Remember to save the image in PSP
Format, as we will be opening in AS.
Open Animation Shop..go to File..Open and find the tag you just saved.
View your animation. I was happy with the animation speed when I opened
it, so I just saved!!
This tutorial is ©BamaVamp and was written on April 22,2007.
Any likeness to any other tutorial is purely coincidental.
My tuts are not to be passed around email groups nor copied and pasted.
Please contact me for use information.


No comments:
Post a Comment